How to Host Swagger Documentation With Github Pages
This article describes how use the Swagger UI to dynamically generate beautiful documentation for your API and host it for free with GitHub Pages.
An example API specification can be seen hosted at https://peter-evans.github.io/swagger-github-pages.
Steps
-
Download the latest stable release of the Swagger UI here.
-
Extract the contents and copy the “dist” directory to the root of your repository.
-
Move the file “index.html” from the directory “dist” to the root of your repository.
mv dist/index.html . -
Copy the YAML specification file for your API to the root of your repository.
-
Edit index.html and change the
urlproperty to reference your local YAML file.const ui = SwaggerUIBundle({ url: "swagger.yaml", ...Then fix any references to files in the “dist” directory.
... <link rel="stylesheet" type="text/css" href="dist/swagger-ui.css" > <link rel="icon" type="image/png" href="dist/favicon-32x32.png" sizes="32x32" /> <link rel="icon" type="image/png" href="dist/favicon-16x16.png" sizes="16x16" /> ... <script src="dist/swagger-ui-bundle.js"> </script> <script src="dist/swagger-ui-standalone-preset.js"> </script> ... -
Go to the settings for your repository at
https://github.com/{github-username}/{repository-name}/settingsand enable GitHub Pages.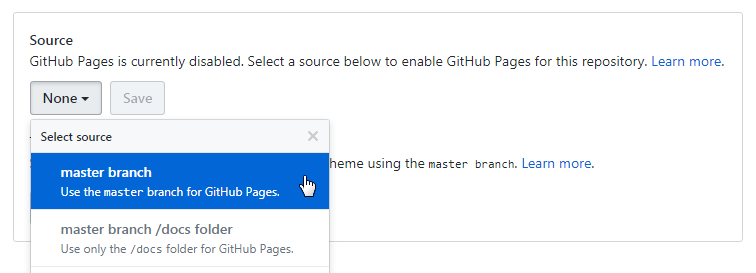
-
Browse to the Swagger documentation at
https://{github-username}.github.io/{repository-name}/.
The sample code and API specification can be found at https://github.com/peter-evans/swagger-github-pages.